
I am excited to be posting at Bits of Everything today. Don’t you want to be a sister in their family?! So many fun things, and such a variety!
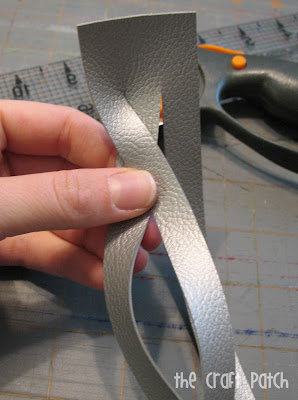
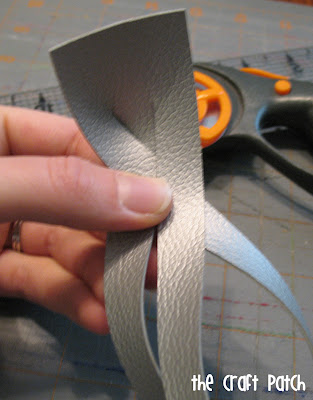
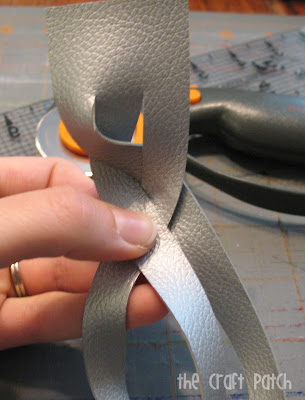
Pinch the part you’ve braided so it doesn’t come undone. Now try to untangle the bottom by flipping the bottom end through the hole as shown. 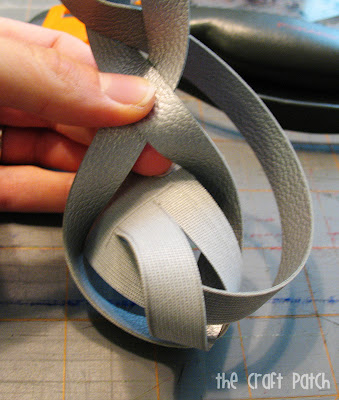 Just keep twisting and turning and when you’ve got it right, it will all smooth out (there’s no better way to explain it, you just keep fiddling until poof! It untangles!) and looks like this:
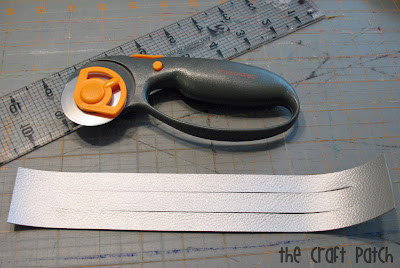
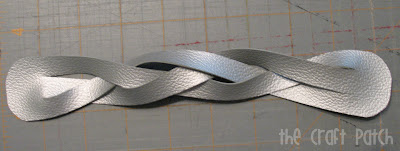 Magic! I love this look, but I wanted to experiment some more, so I undid the bracelet (then I was worried I wouldn’t be able to get it to work again) and cut each of the three strands in the braid in half, so that I had six narrow strands. Then I bunched two strands together and braided it again the same way as before, but with two strands in each of the three parts. Make sense? The end result is a more complicated looking bracelet that lays flatter on the wrist.
 For another variation, instead of just braiding L/R/L once, try doing it twice. It makes a tighter braid and gives it a whole new look.Next, it’s time to try it on and trim off the excess from the two ends. Then round the corners. Here’s how I did it:
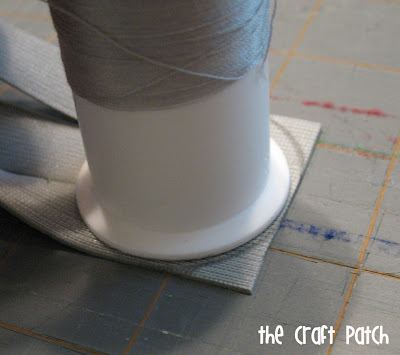 Now we add closures. I debated on this one. Buttons? Ribbon? Clasps? Hot glue? (haha…totally kidding!) In the end I chose snaps. I searched and searched Joann’s notions wall to find something stylish that didn’t require buying any setting tools, and this is what I found:
 I followed the directions on the back of the package,
  but here’s a visual for those who need to see it:
 Place the pearl part on the outside of the bracelet and lightly press the tongs into the vinyl.
 Flip the bracelet over and you should see the prongs poking through. Using the tips of your scissors or your fingernails, press the fabric all the way through so the entire length of the prongs is showing.
 Center the back piece over all the prongs and double check that they are all in the ridge. Put a spool of thread over the back and hammer until…
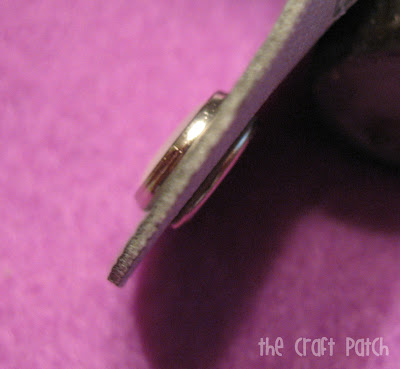 …it is flat when you look at it from the side.
 Now do the other side of the bracelet. Place the outie part of the snap on the right side of the fabric and center it. Push the prongs through like before. There’s no picture of the inside of this one, but you’ll put a little ring over the prongs and hammer until it’s flat. Then you are DONE!
 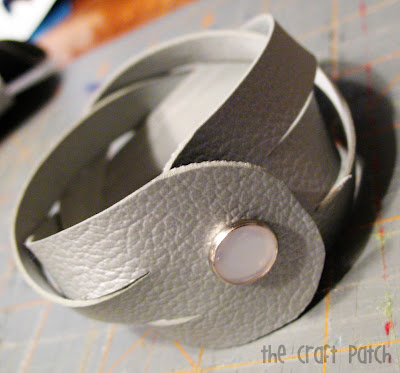 Yay! I am IN LOVE with the final product! Good thing I have tons of vinyl left over so I can make one for me!
  Next I am going to try to make a solid wide cuff and hand-sew beads or sequins onto it. Wouldn’t that be pretty?!
These are so cute! I just might have to try it! 🙂
so cool. I want to try this.