Cali from Cali Stoddard Photography is back today with tips about Aperture. Make sure to read Part 1 on Exposure HERE!
*********************************
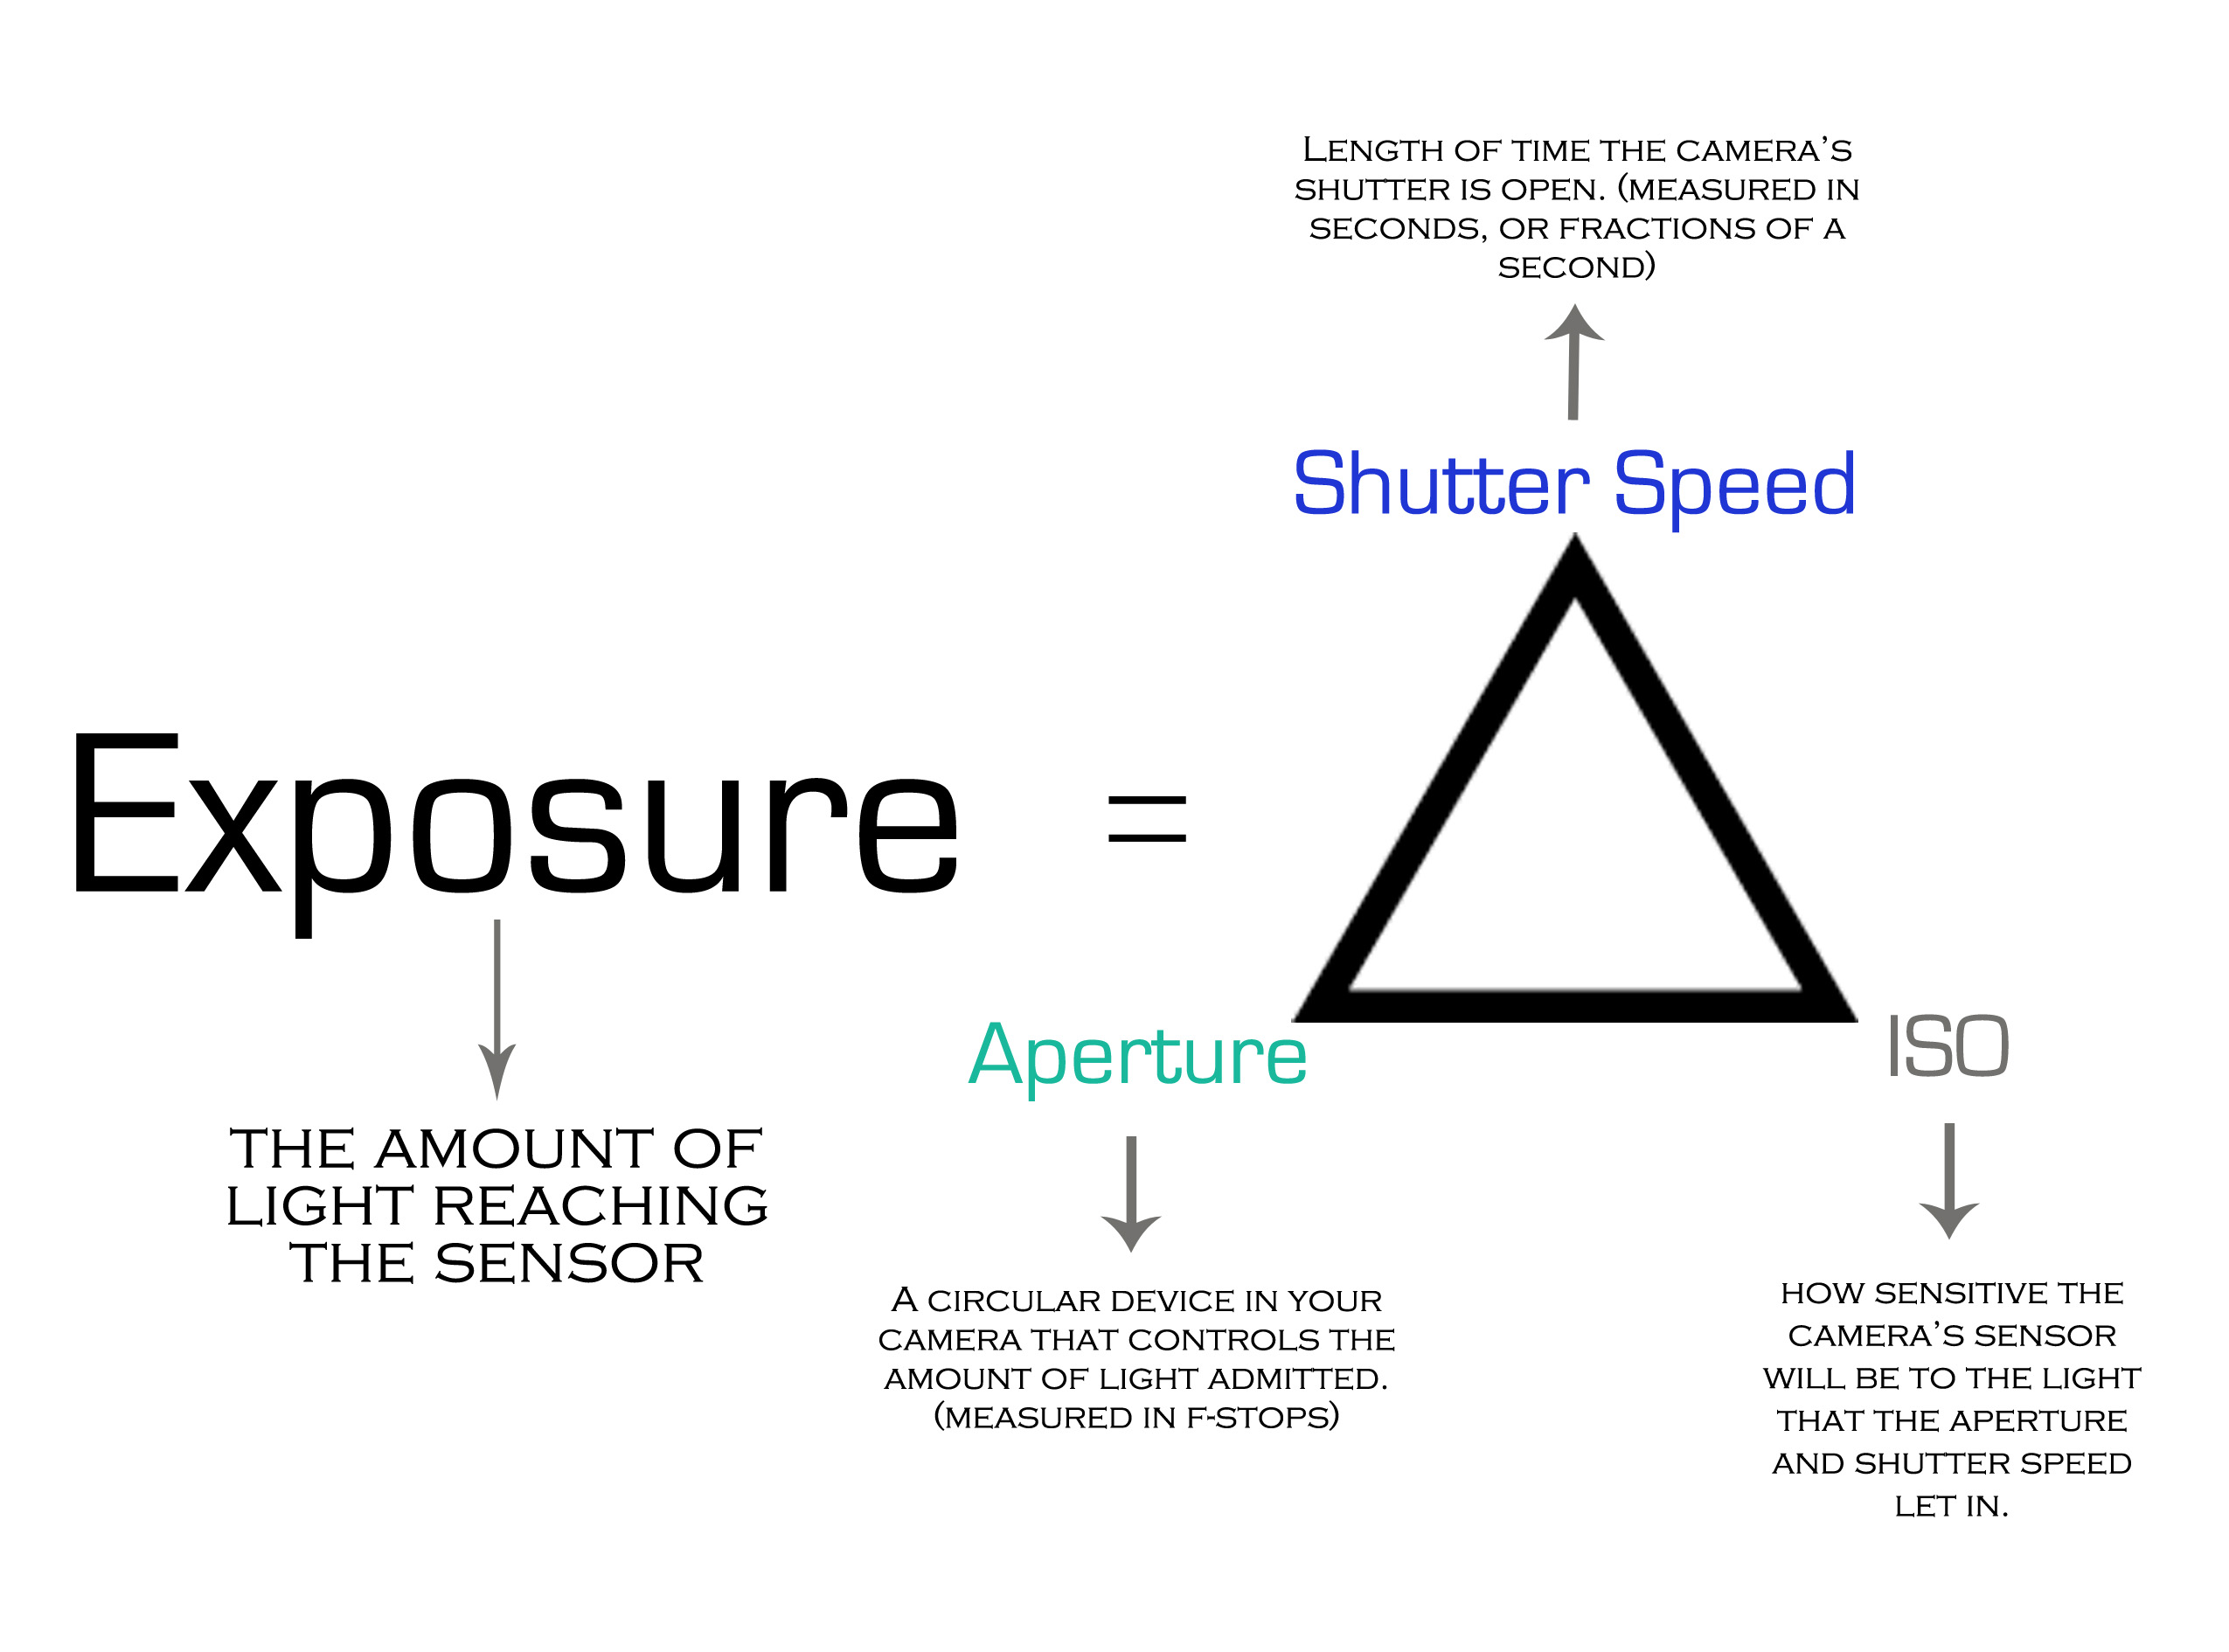
In order to get a good exposure with your camera, you need to learn to control 3 things. Aperture, Shutter speed, and ISO.
Today I’m going to explain Aperture.
 Aperture is one of my favorite parts of photography. Everyone always wants to know how to get that “blurry” background when taking a portrait, and this is the key! Aperture is a circular device in the camera that determines how much light is let in. It is measured and referred to by “f-stops”. The semi-confusing part is that the smaller the number, the bigger the opening. A little backwards right? The lower the number, the more blur you get (shallow depth of field) in the background. Here’s a chart that shows different apertures.
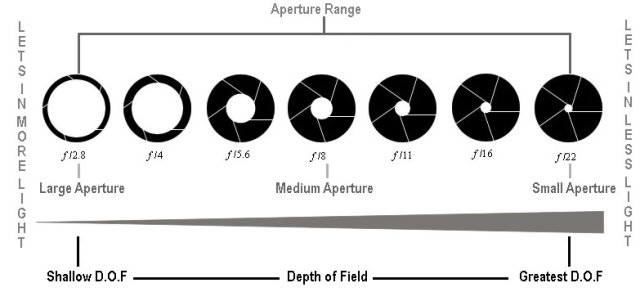 Image found HERE
Here are some examples of how different f-stops change your depth of field.
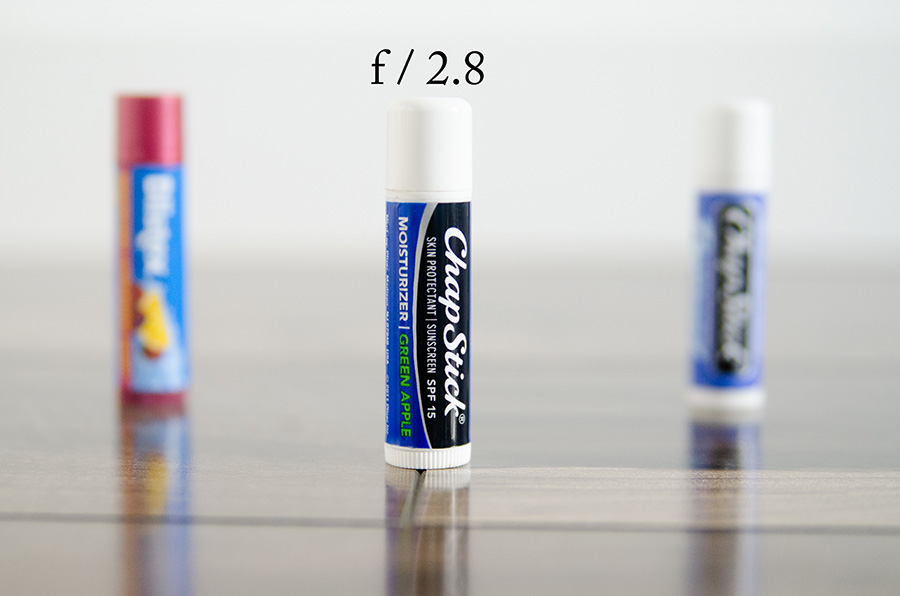 f/ 2.8 means the circular opening is WIDE OPEN letting in the most amount of light possible. Just like your pupils, when they are all the way dilated they can’t focus too clearly… and the same is true for your camera. Using a wide open aperture is perfect for adding emphasis on a person’s face, or when you only want one part in focus.
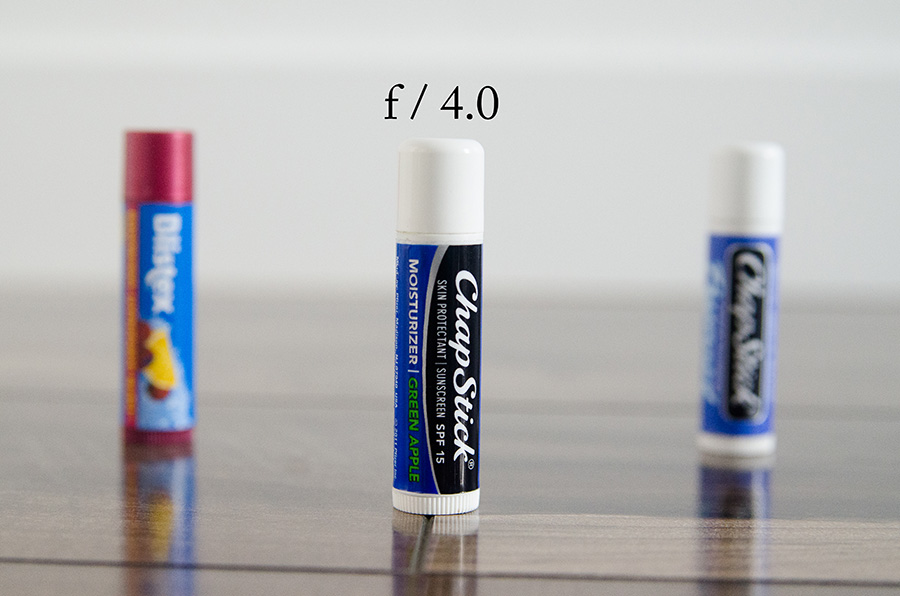
You can tell that we still get a shallow depth of field with f/ 4, but the other tubes of chapstick are coming more into focus.
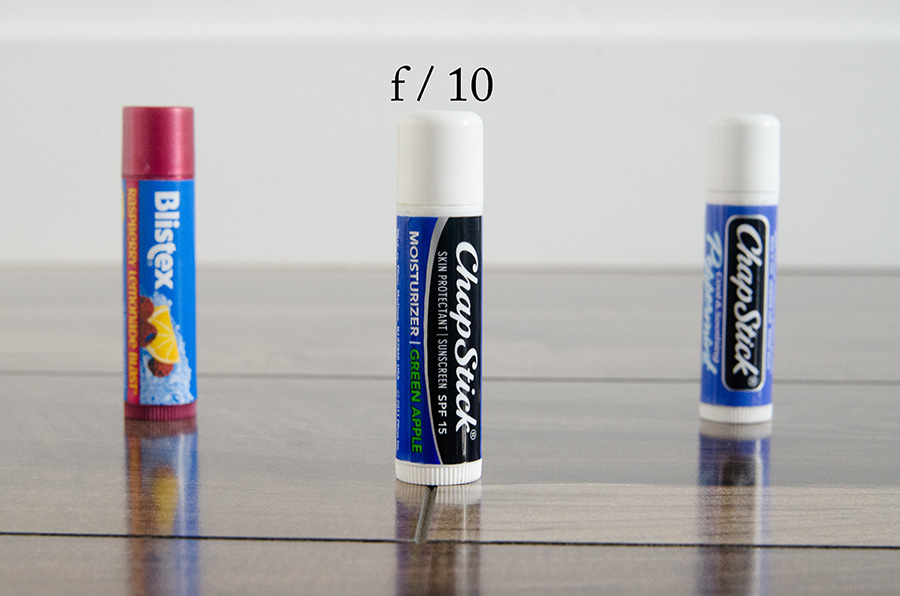
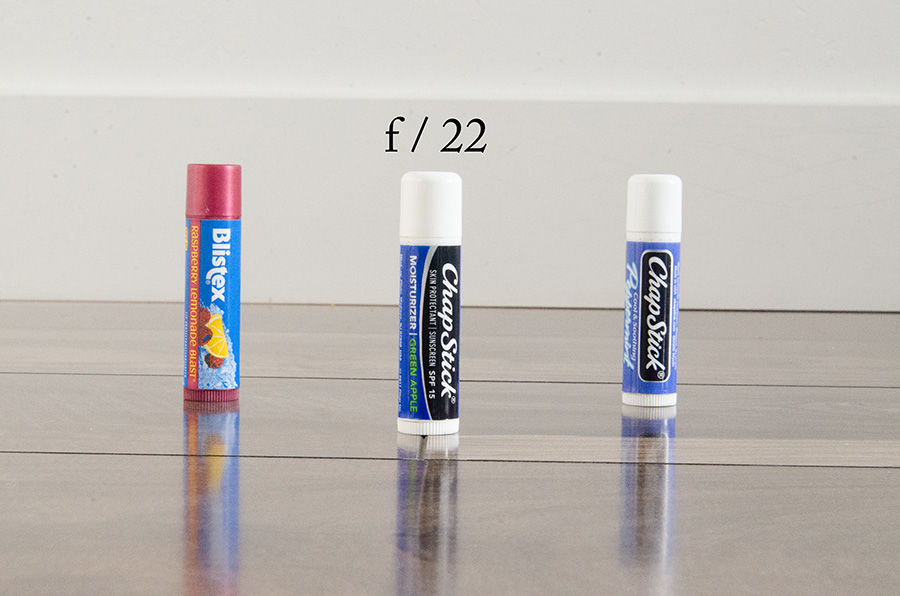
f/22 is the smallest opening that most lenses go. f/22 is perfect for scenery shots where you want everything in focus, the mountains, the field and the cows in the field. 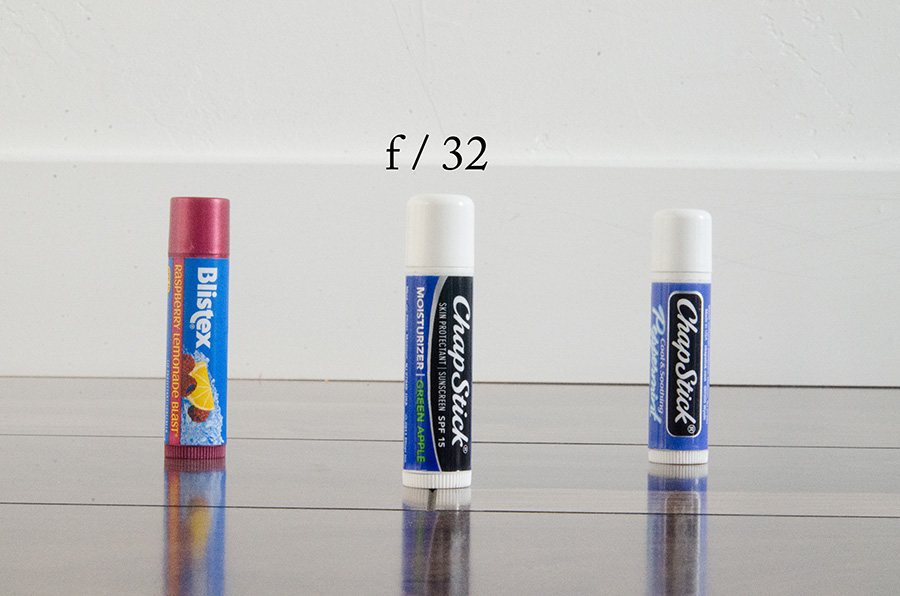 f/32 is an even smaller setting some cameras allow you to do. This lets in the least amount of light, and allows the camera to focus on everything in the picture.
So, let’s recap.
f/ 2.8 (big opening, lots of light) would be perfect for a portrait of one person focusing on their eyes.
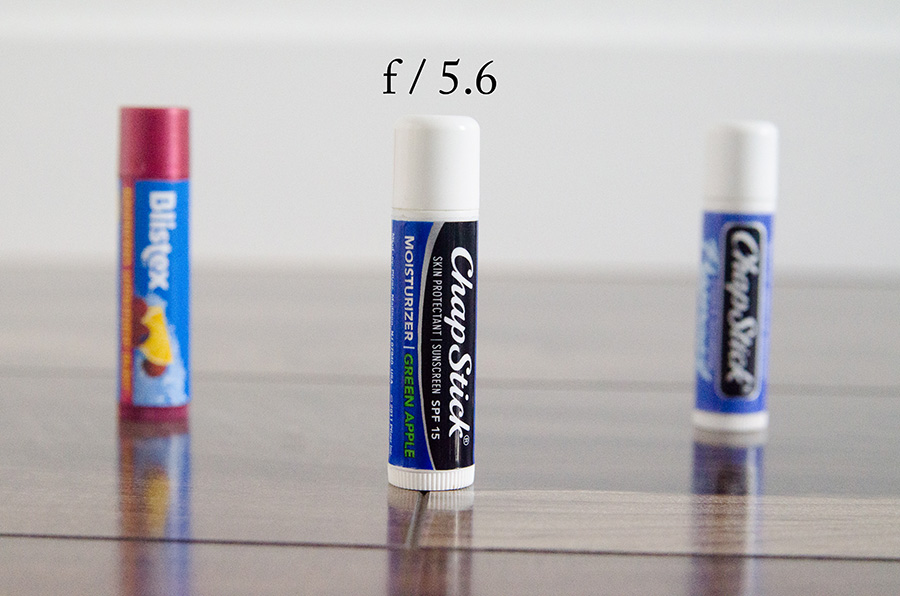
f/ 5.6 (medium opening, less light) is great for a small family portrait. It allows you to get most everyone in focus.
f/ 22 (small opening, least light) is awesome for large group shots and scenery shots where you want everything in focus.
*To practice Aperture, you can put your camera on the “A” mode. That allows you to choose your aperture, and the camera will choose the shutter speed for you. *
Practice, practice, practice!
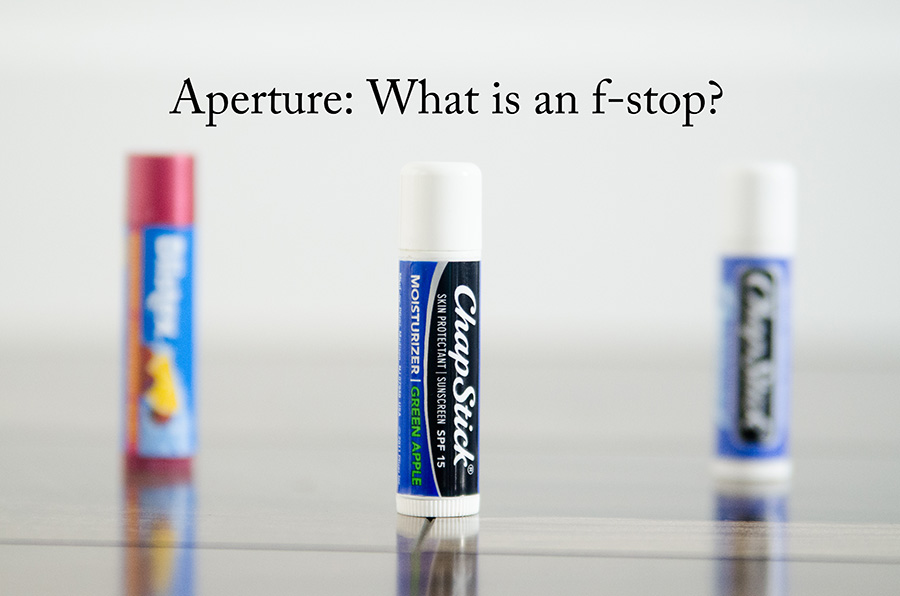
(it helps to practice on things that don’t move… kids can be hard. Practice with tubes of chapstick if you need to!)
I’m loving this series. I might actually learn how to use my camera. Pinned!
Seriously loving all of these! It’s always great to learn new tips and tricks and things about my camera!
Nice tips, once again Cali! This is such a fun series.
I love the visuals to help explain things. But my issue is, what are some ways you can get more light in when you change the aperture? my pictures always seem to be darker when it make it smaller.
I’m in love with all of these! It’s always exciting to discover new camera tips and tricks! cookie clicker