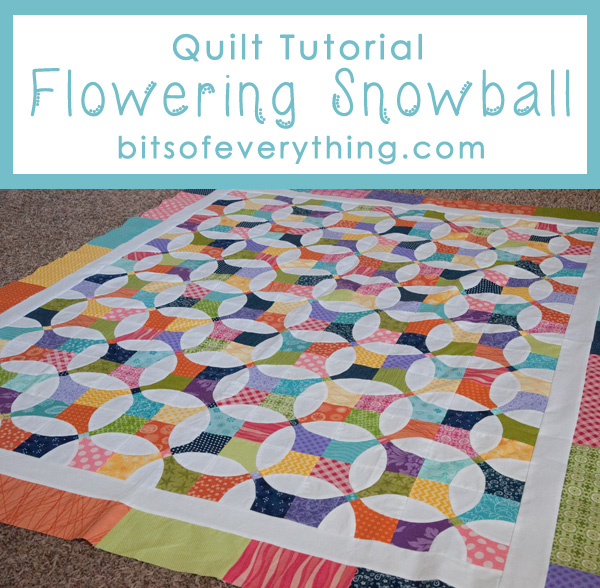
I’ve been showing you my progress of my Flowering Snowball Quilt on Instagram for a while now. I’ve had a few questions about how I made it, so I thought I’d share a quilt tutorial with you.
First, print this Flowering Snowball Quilt Template.
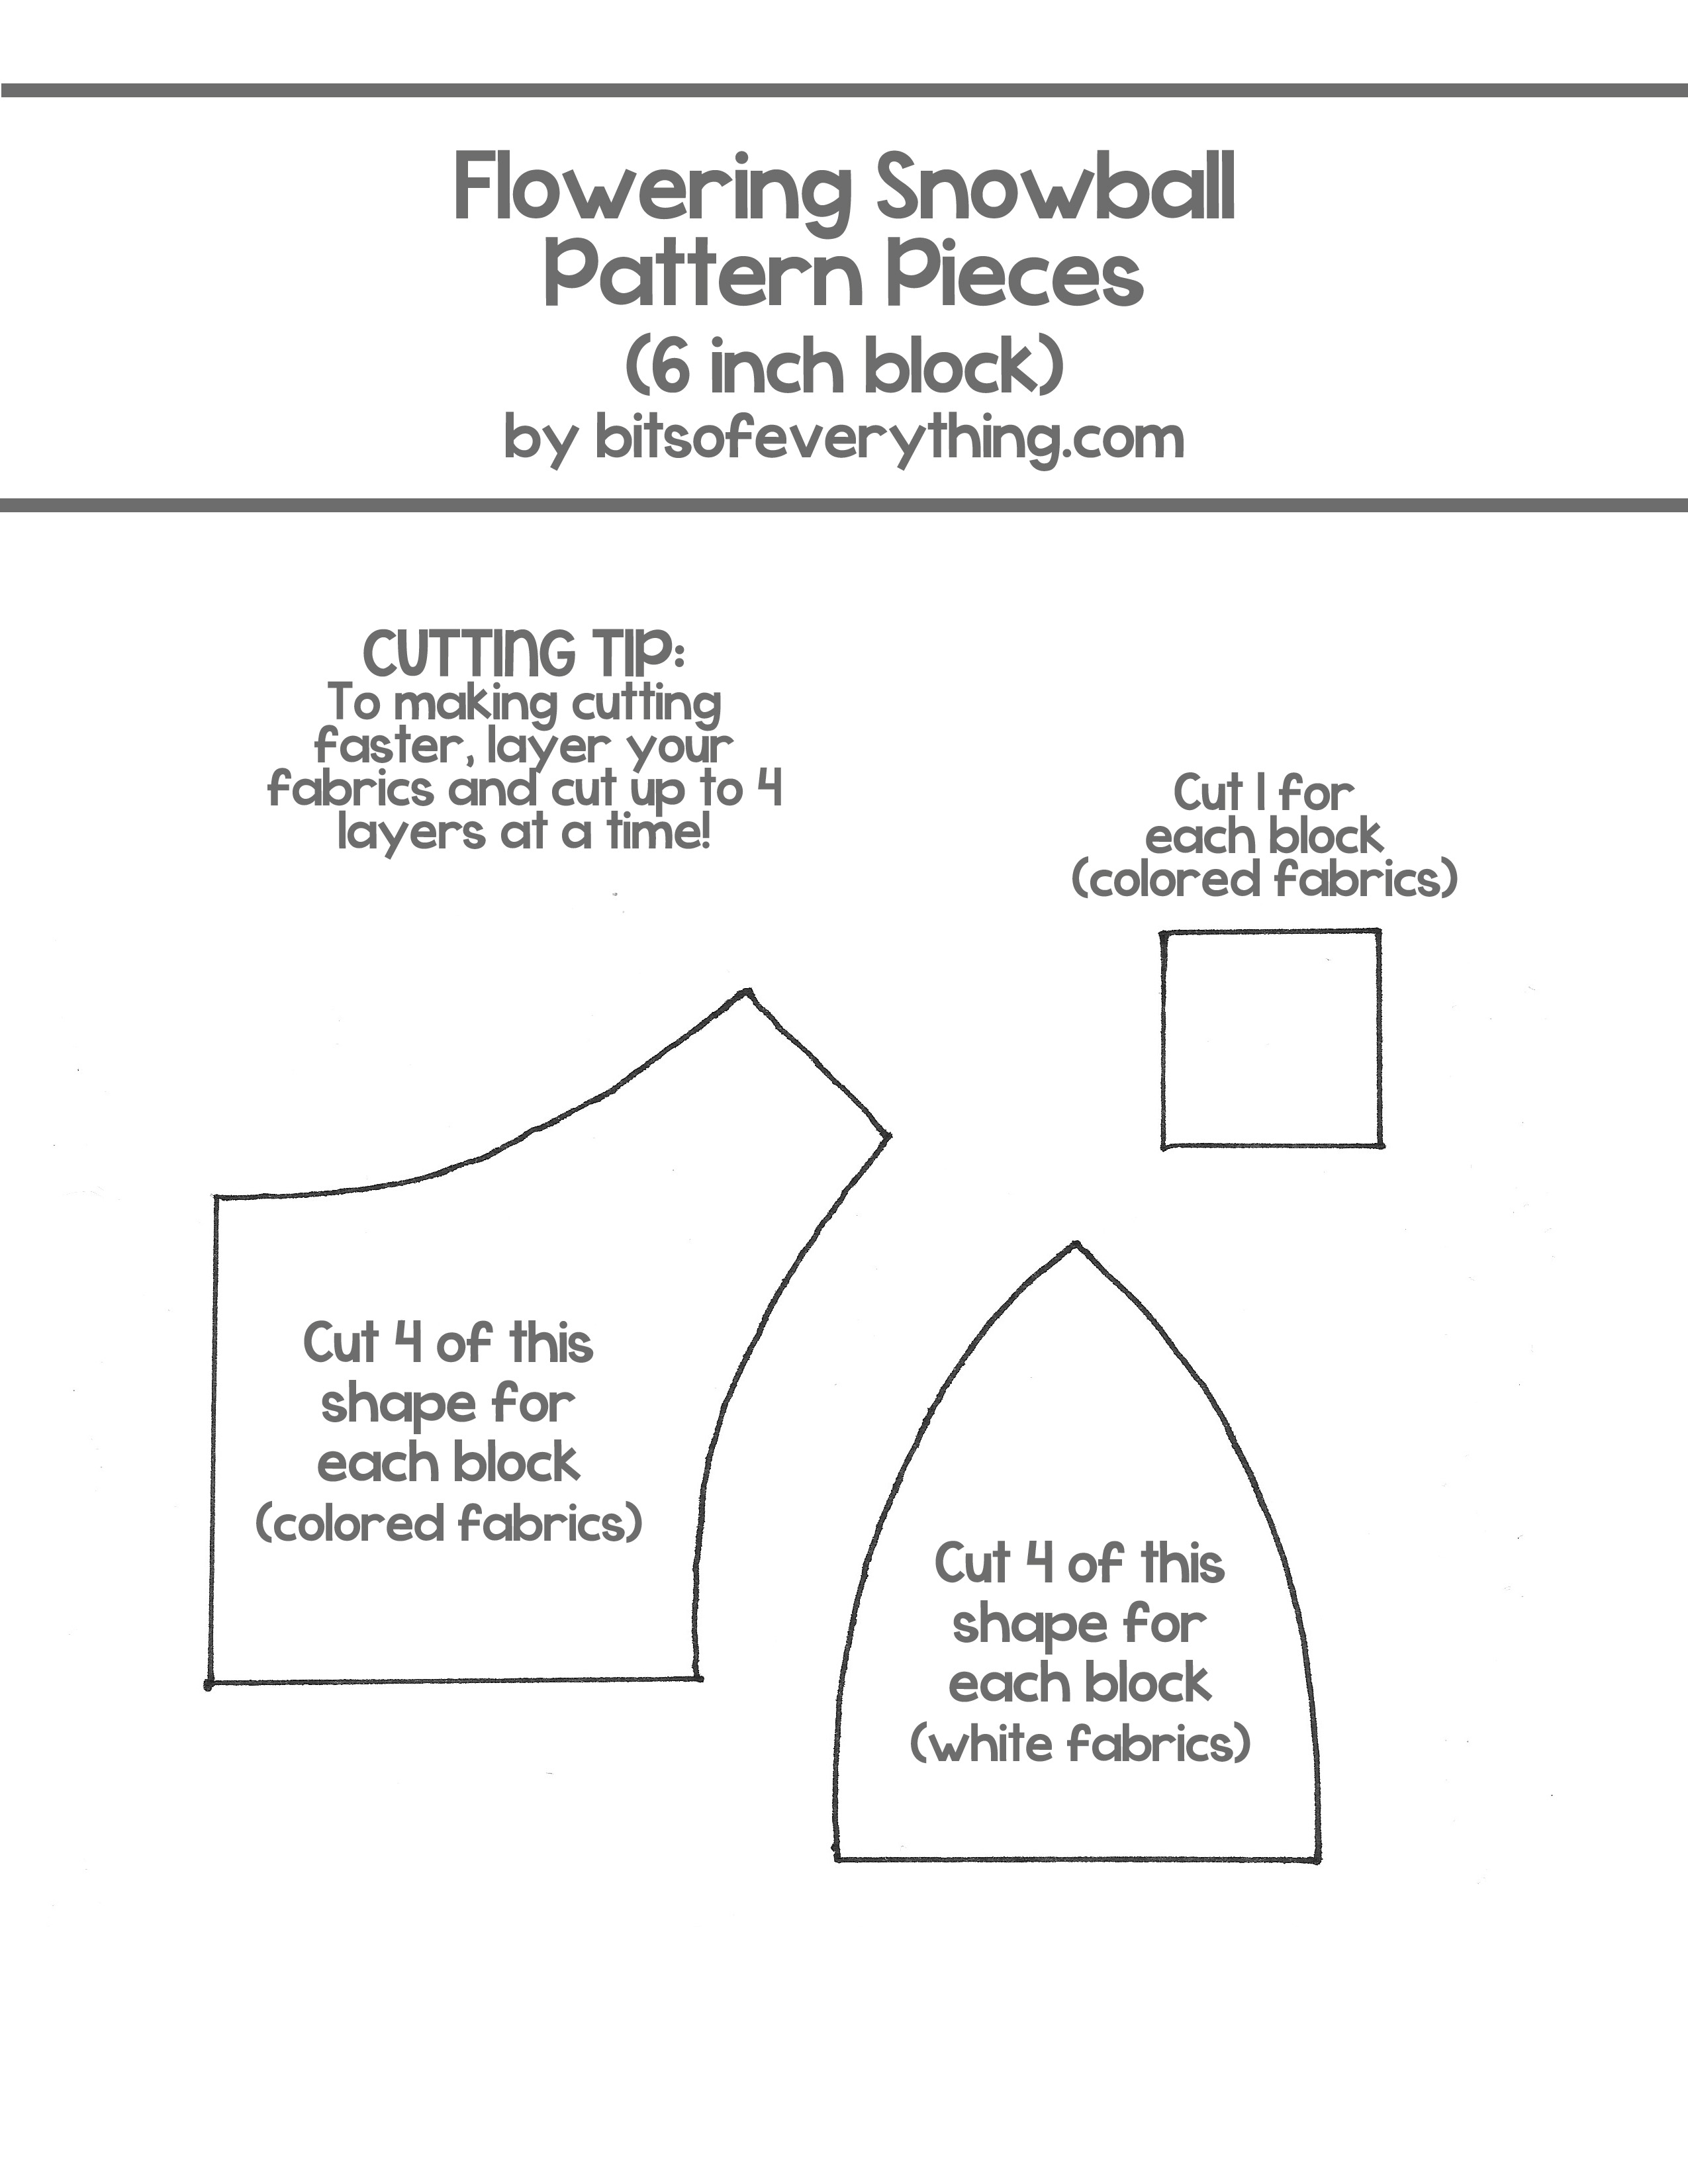
Printing this template at it’s current size should give you a 6 inch square block. You can shrink or enlarge this template if you would like bigger or smaller squares.
Second. Using your template pieces, cut out fabric. To make this process quicker, be sure to layer your fabrics. I usually cut 4 layers at once. Now you should have all your pieces ready to go. I used scraps for all my colored fabrics. I used about 1 yard of white fabric.
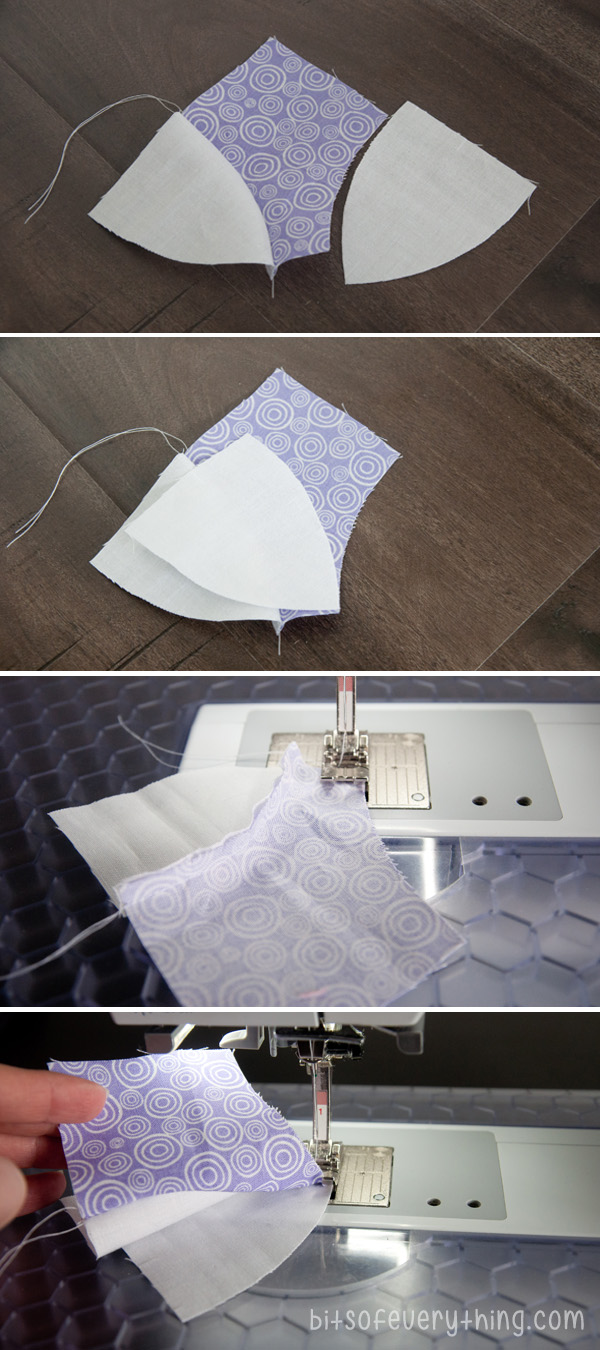
Third. Sew pieces together. Your squares are made up of 3 sections. First we will made the diagonal section, then two corner sections. Sew your three pieces together that form the diagonal section. Press seams to the inside middle square.
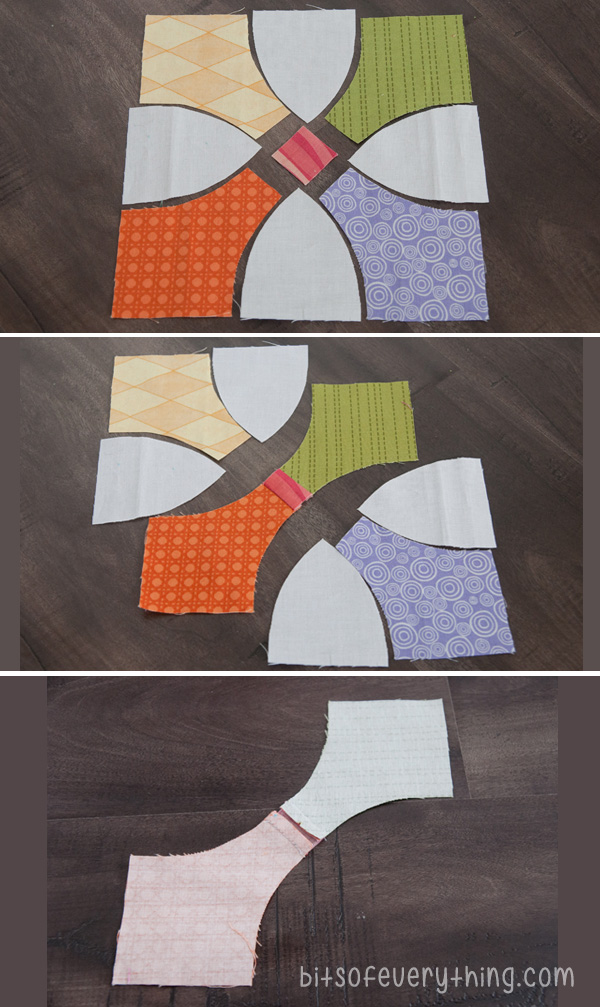
Sewing curved lines can be tricky, but the more you do it, the better you will get. It gets easier as you go, I promise! Now let’s make the corner sections. After laying out your pieces, fold the corner colorful fabric on top of the white piece on the left. The top right corner is where we are going to start our first seam. Put that corner under your presser foot. Clip the edge of your colored fabric to help it straighten out a little. Hold into place aligning up your curved line, and sew!
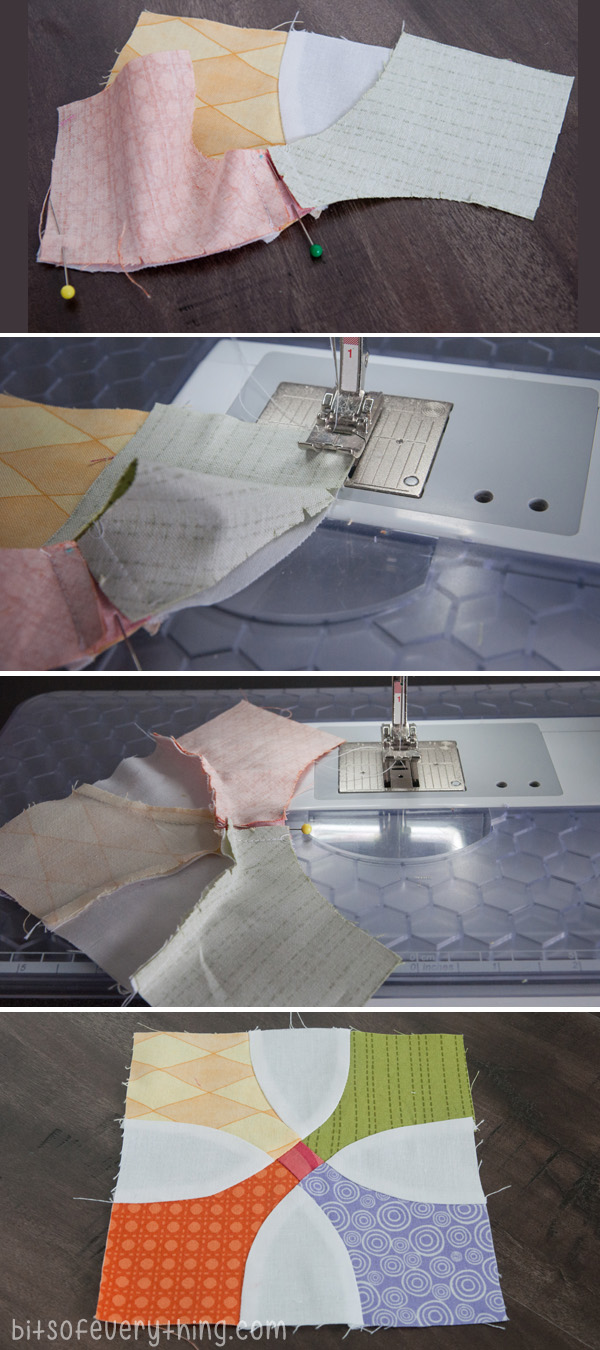
Next, we will add the other side of our corner section. Lay it back down how it is supposed to be put together. Fold white fabric on top of the colored fabric, aligning the the bottom corner. This is where you will start your next seam. Flip it over so the white fabric is on the bottom and put it under your presser foot. Clip the edge of your colored fabric again, hold into place and sew!
Once your corner section is sewn together, press the seams to the white fabric. This is the direction the fabric lays the best. Repeat this process to put your second corner section together. Now we are ready to attach our corner sections to our diagonal section.

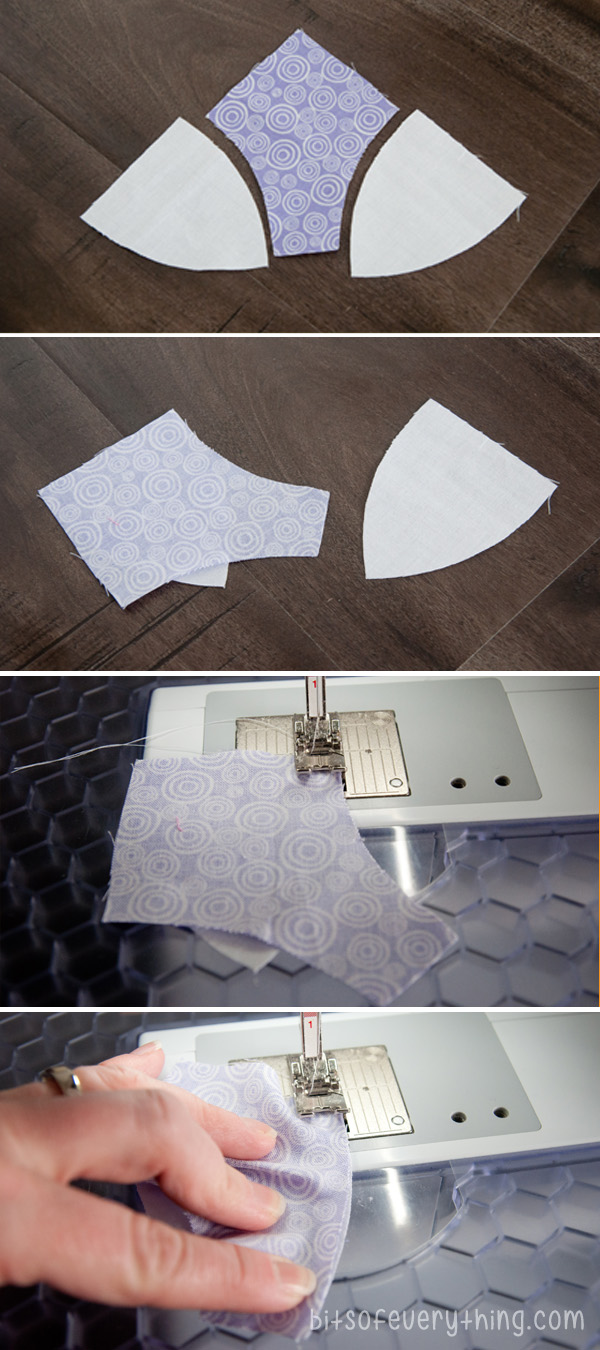
Here we go. Using only 2 pins, pin your diagonal section on top of a corner section. Clip the edges of the colored fabric so that is gives a little better in the curve. Both of these seams will be done with the diagonal section on TOP. Once you’ve completed these two curved seams, you are done! Press the seams to the white fabric, and trim edges to square up your block (if needed!)
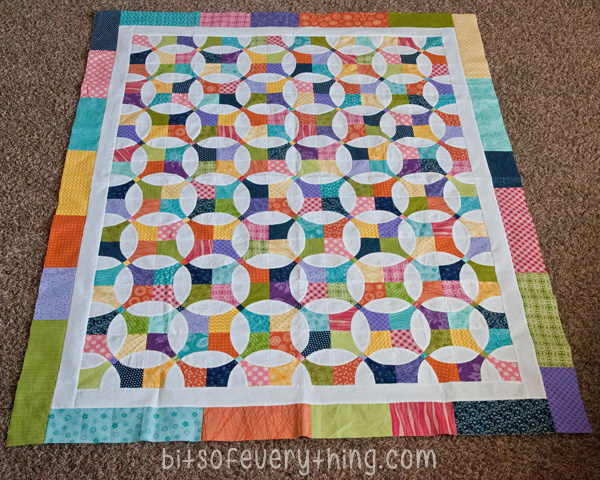
I finished off my quilt with a 2.5 inch white border, then a 3.5 inch colored border. Finished size is 50X60. Love, love, love it! I can’t wait to get this quilted. Don’t worry, I’ll show you once it’s all done!
This is an awesome tutorial. Outstanding quilt. I love the colors. I can’t wait to see it quilted. Thank you for sharing your techniques.
Love the quilt
Thank you so much for the pattern/template. I have looked for this for a long time. I will probably make mine scrappy.
Thank you so much! I have had this pattern for forever now. I even cut out all the pieces but the curves have scared me so bad I haven’t tried. But after seeing your tutorial and hints I am ready to try!
Gorgeous, gorgeous!!! I came over to check it out, seeing what Melissa Corry made for the bee block. Hugs, H in Healdsburg
Just made my first block, and your tutorial was so helpful! I used a set of bought acrylic templates to cut my fabrics, which made it very easy. Sewing those curves was scary at the beginning, but you were right–I got used to the curves, and every seam was less scary than the one before it. Thanks so much!
Where did you get your acrylic templates? I am like you. I love this quilt and the fact that it is scrappy.
Are they made by Louisa Smith of Strips & Curves?
THANK YOU so much for providing this patter! I saw this quilt in a show several months ago. I have been searching and searching for the pattern. Thanks so much for sharing!
I love the colors. What fabric did you use.
Hi there,
I have printed out your pattern and the white fabric that I use I seem to have to stretch out quite a bit for it to not pucker, I have tried cutting it a different way and making sure the fabric is on the bias, but it still seems to be not sitting properly. When I finally get right and make it to the end of the block, the block is puckering and not sitting flat.
I sewed everything with a 1.4 inch seam and I am not a beginner quilter. I am just not sure why my block is not sitting straight.
Thoughts?
Are you sewing with the white fabric against the feed dogs? That is to say; sew with the color fabric on top, facing you?
She mentions clipping the initial curve in the colored piece. You can do this even after you sew. Clipping is a sewing term where you cut a tiny V into the seam allowance to break the fabric thread tension in the curve like you do with sleeves and necklines so that the seam opens flatter.
How many different patterns of fabric did you use
Me gusta mucho esta colcha, siempre había querido tener este patrón, gracias por compartir. En cuanto a la suscripción, no entiendo lo del sitio web publicado, no se si debe escribir tu sitio y eso fue lo que hice porque yo no tengo, esto lo encontré en Pinterest, buscando ideas para mi gran pasión que es el patchwork. Voy a probar hacerlo.
Bought templates at Honey Bee Quilt store in Austin, Texas. Love them!
Beautiful quilt! Thank you for the tutorial. Curve is my pet peeve but hope to give a try! God bless!
Awesome tutorial and templates, thanks!
Are all the seams pressed towards the white, how do they nest when the blocks are sewn together.