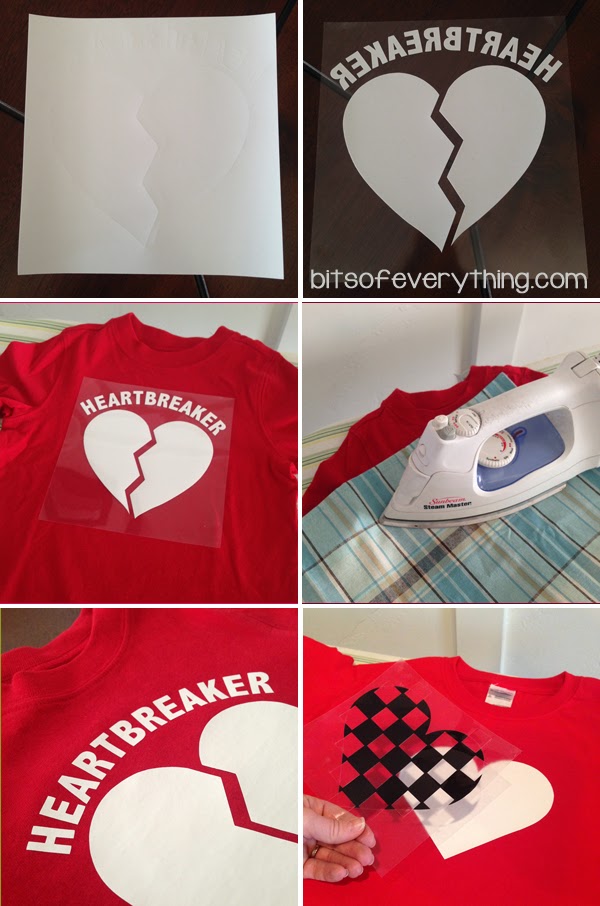
First – create your design and cut your heat transfer vinyl with the shiny side on the bottom. Be sure to flip your image before you cut it (your words will appear backwards) so that they are going the right way when you iron it onto your shirt.
Second – peel off the vinyl that is NOT part of your design.
Third – place vinyl on your t-shirt and cover with a towel.
Fourth – iron over your design for about 60 seconds, then let it cool for 60 seconds.
Fifth – remove the backing from your design.
Sixth – for designs with more layers, add the next layer using the same process. (Checker board heart.) Just be sure to not let your iron touch the designs that are already in place on your shirt.
Done! Wasn’t that easy! I love projects like this. Simple. Quick. Darling.
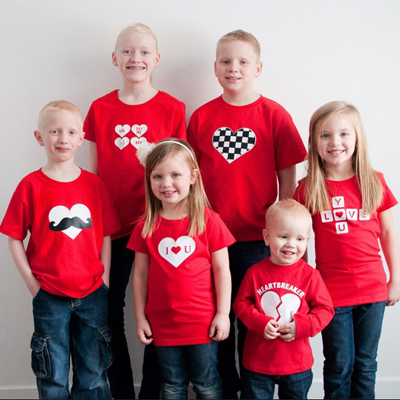
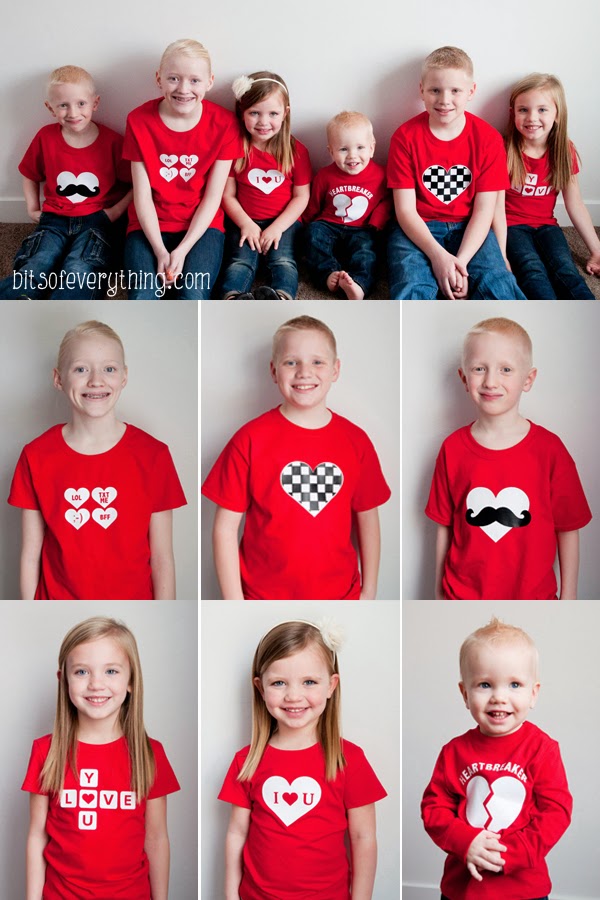
Here is a closer look at all 6 of the t-shirts we made.
Go order some vinyl from Expressions Vinyl today and get making some fun t-shirts for your kids.
G’s shirt kills me. SO SO cute! Fun project, Holly and Cali!
Ooohh! I’d like to try that! My kids would love new personalized shirts.
So cute! I would love to try to make shirts.
Those are soooo cute! I love them!
These are such a good idea! Cute!
super cute and easy!
Cute! I’d make birthday shirts for my girls. 🙂
I’d want to make a super cute shirt for my little guy. Seems like everyone has made adorable outfits for their kids lately!
SO cute!! Love all the different designs!
Love your T-shirts! I would make home decor items using the vinyl! 🙂
I’ve never been brave enough to try the heat transfer. You make it look really easy!
a girl scout cookie sign for my car
What an adorable idea!! Pinning!
I love these.
So cute!
I would love to make some sort of personalized shirts for my boy+s. I’m sure they’d have tons of fun deciding what to put on them. 🙂
Dezi A sethdez@hotmail.com
so cute, I think i’m going to try to make shirts too!
Those shirts are adorable. Of course that is what I want to make. TFS!!
Adorable shirts!
I love making personalized shirts.
So cute!
I’d definitely make some shirts for me and my family.
What a great idea! I would love to try!
so cute! I’m a total iron-on vinyl junkie so I’d make a ton of stuff but maybe stuff for the new baby that’ll be here soon you know once I wake up 😉
These are all so darling! I want to give it a try now!
Such a cute bundle of shirts!
I would use the vinyl for pillows. Or something. ~grin~
I would want to make a headboard with it! <3
Oh my goodness! I love your Valentine’s Shirts and the LOVE/LUCK blocks! I would take a stab at making both of those!
I’d make some kind of home decor item.
I’m a newbie and would just LOVE to win some vinyl to try and make my little ones a Valentines day shirt!! Thank you!!
LOVE THIS IDEA!!
where did you get the image for the heartbreaker?