A few weeks ago, I did another guest post on the Ribbon Retreat Blog!
This time I showed how to make super cute Spikey Bows!
This time I showed how to make super cute Spikey Bows!
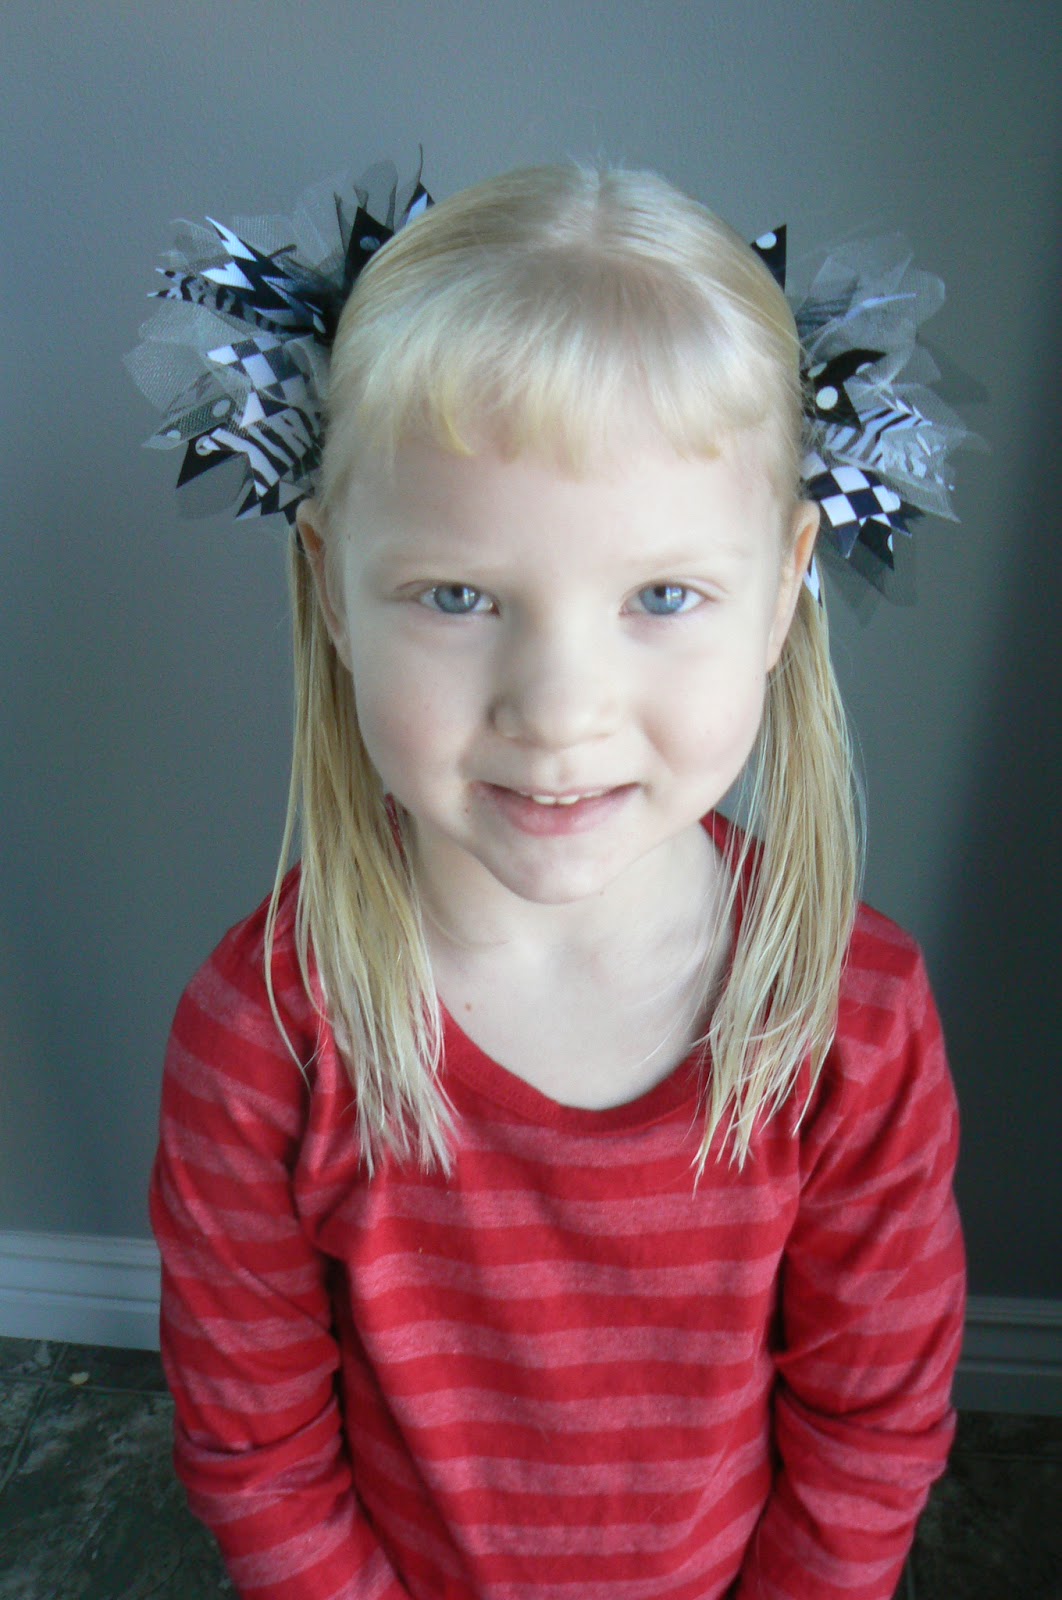
These Spikey Bows are SO cute! My girls always get compliments when they have them in their hair.
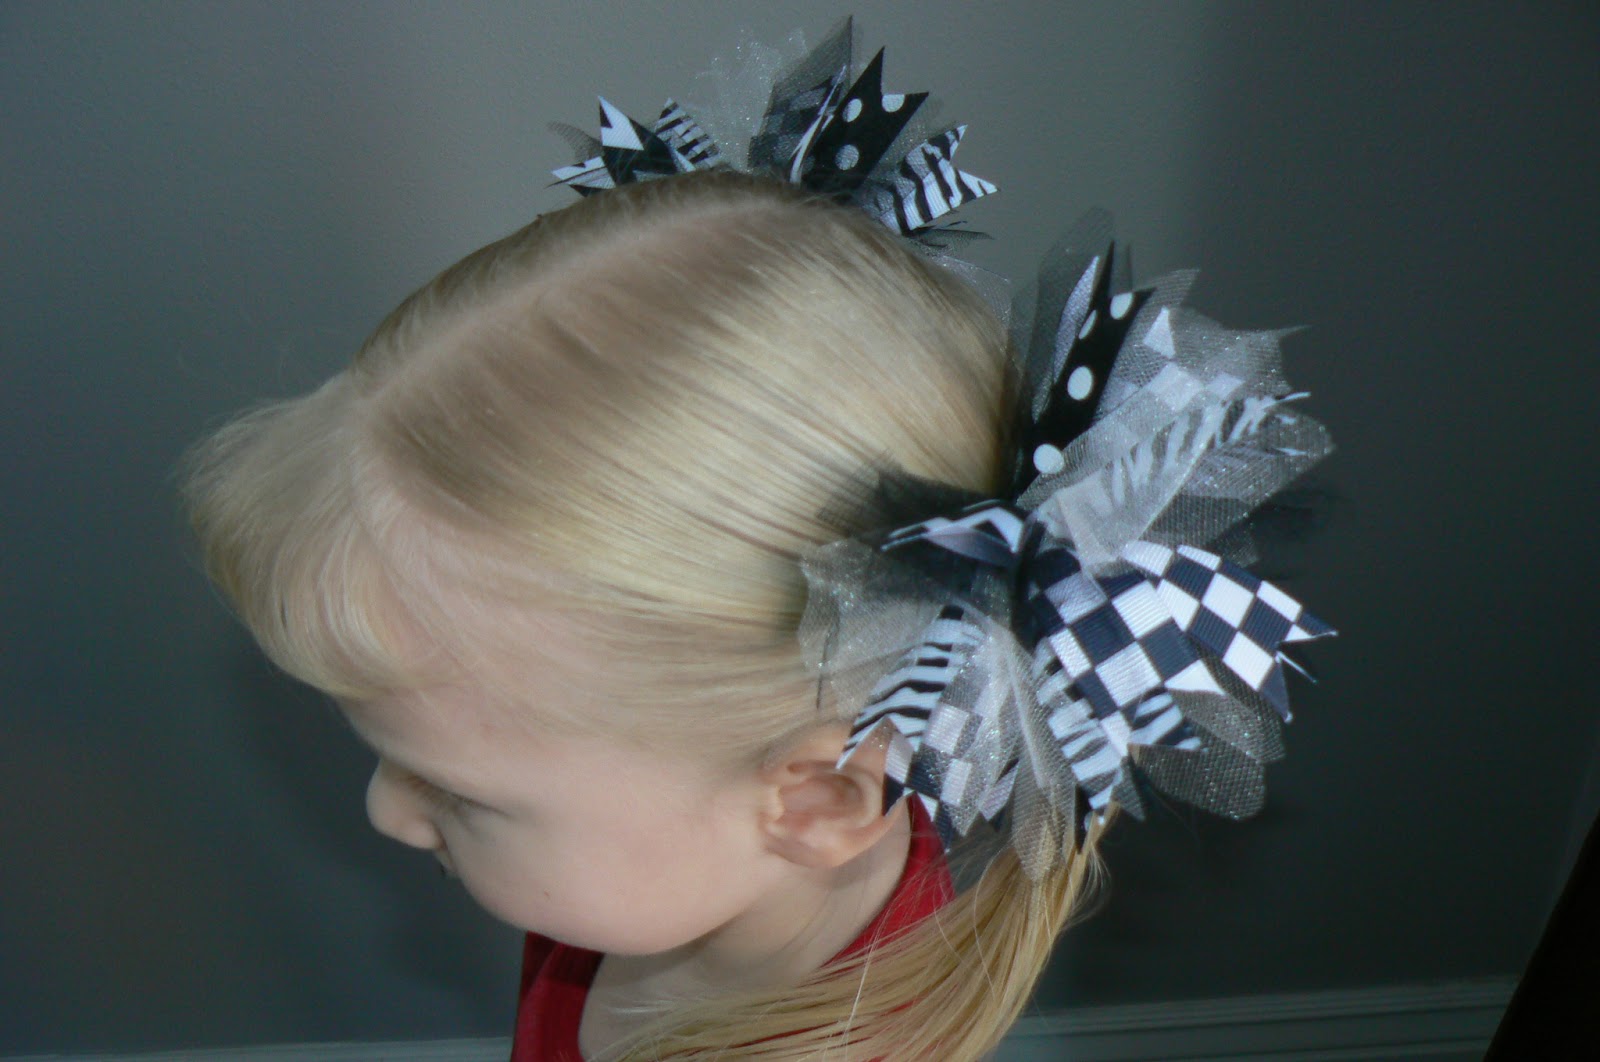
You can make them small or large. For these bows, I used 7/8″ ribbon cut 5 inches long,
which makes a larger bow. I also added tulle, which makes it a little more full and fabulous!

First of all, here are the supplies you need:
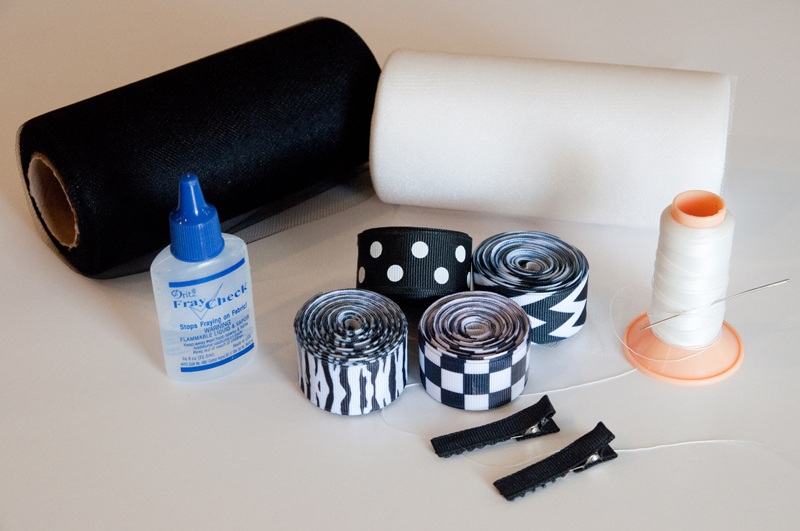
ANY color or print 7/8″ ribbon you want. The Ribbon Retreat has so many cute designs to choose from.
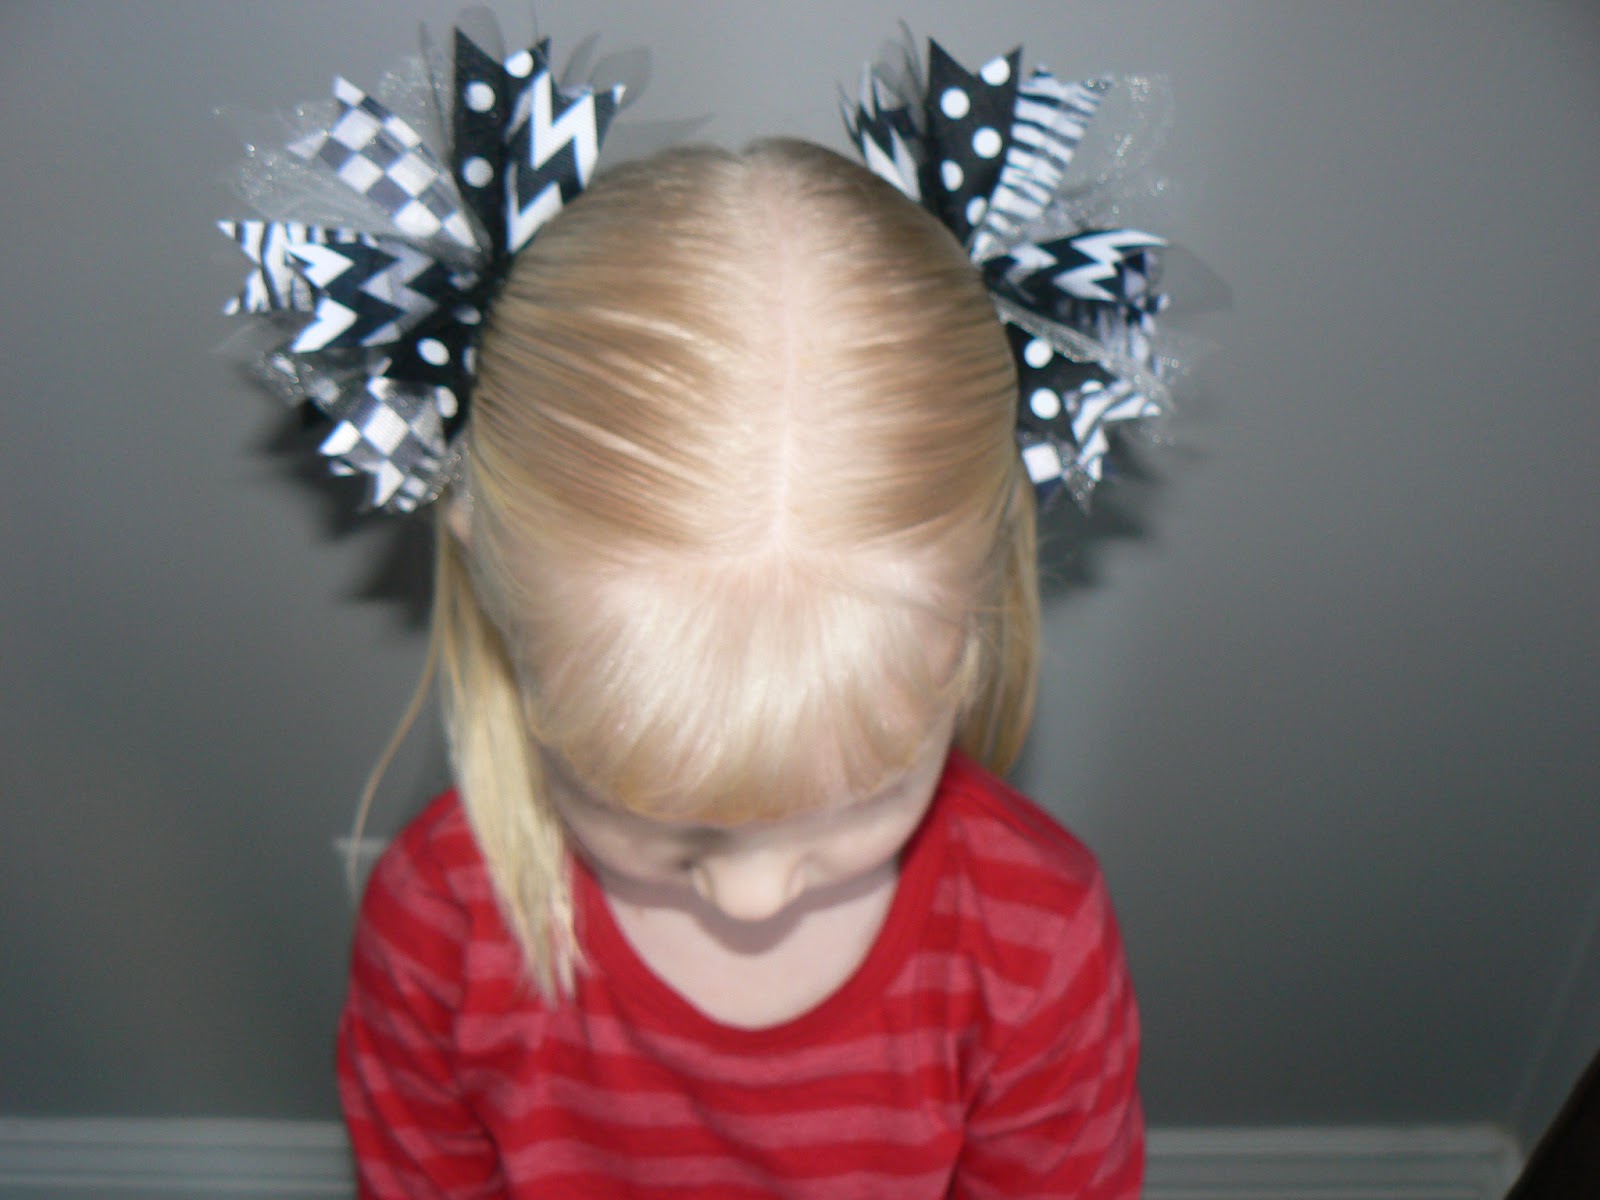
This time I used the same colors (black and white), but all different patterns.
I used the new zebra print, the polka dots, the checks, and the chevron print.
THEY ARE SO FUN!!
THEY ARE SO FUN!!
I also used the black glimmer tulle and the white glimmer tulle.
You will also need 2 alligator clips (I covered mine), fray check, and a needle and thread.
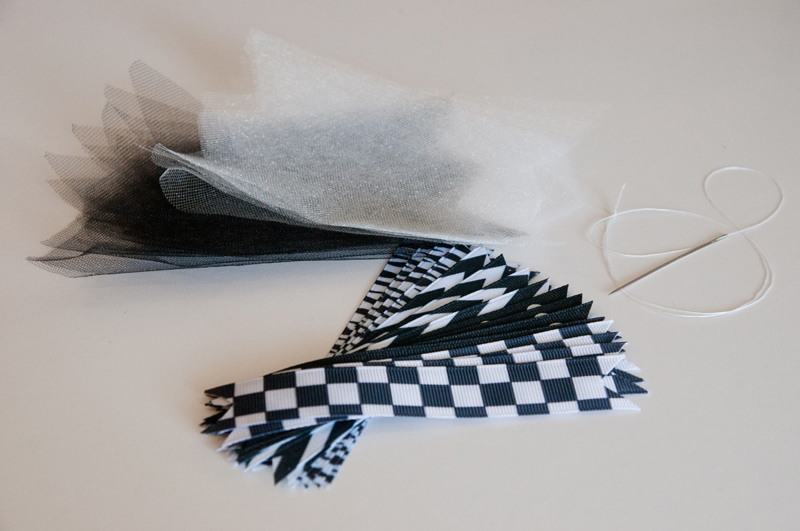
The first thing you do is cut the ribbon into 5 inch long strips, fold them in half (length wise)
and cut the ends on an angle, giving them a spikey effect.
I cut 4 pieces of each pattern of ribbon (for the set), 2 for each bow.
and cut the ends on an angle, giving them a spikey effect.
I cut 4 pieces of each pattern of ribbon (for the set), 2 for each bow.
Next, you will treat the ends of the ribbon with fray check so that the ribbon does not fray.
I left the tulle the width it was, but cut it in 4 inch length increments. I cut 8 pieces of each black and white (for the set), 4 black and 4 white for each bow. Then I cut an “M”, or two angles, on each end so that they were more spikey looking. You don’t need to treat the ends of your tulle.
Now you are ready to put it all together!
First, I fold a piece of ribbon in half (length wise again) and put onto your needle.
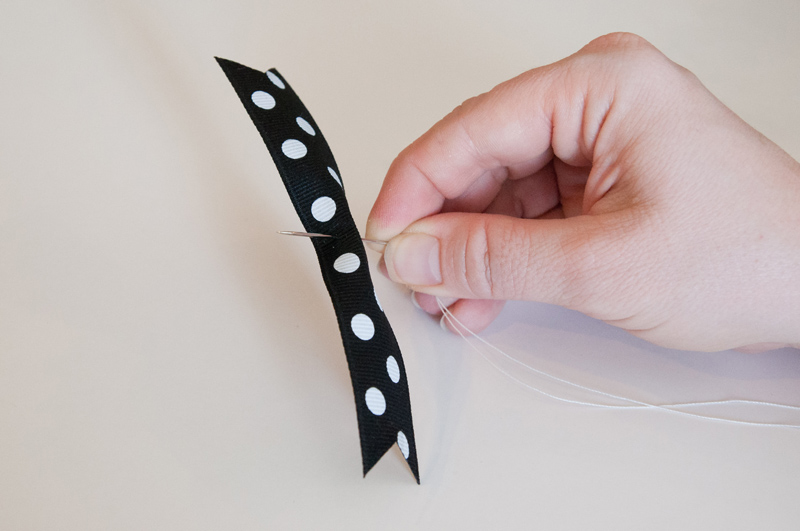
Repeat with the next ribbon to make an X on your needle.

Then I fold a piece of tuelle (2 times length wise) and randomly put them between the ribbons.

Like this…

Then add more ribbon and more tulle. 

Keep adding until you have used all of your pieces of ribbon and tulle.

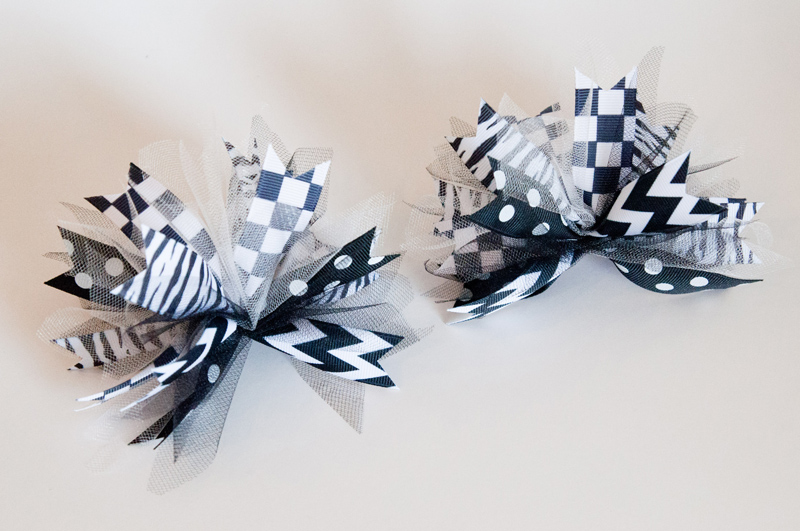
Then take your needle up and down a few times until you feel it is very secure, and tie a knot.

Turn it over and you have finished your first spikey bow!

Then repeat the whole process for the 2nd spikey bow and you will complete your set!

Finally, I hot glued each of them on to a covered alligator clip and they were ready to use!
This is how they look in the hair!
Here are a few more ideas with different sizes and colors!!

Emily- you are so talented! Would you ever consider doing a class on making bows for us less talented gals like me! You want treats I am your gal! Let me know!
Thanks Courtney! You are so sweet. Sure. I’d love to get together and do crafts sometime. 🙂 Treats and crafts go hand in hand! 😉
Just popping by after BYB2013 this last weekend! Love these darling bows. Having a look around your site & you gals have great stuff! Off to check out more!