It’s not too late… You still have time to make this simple table runner to enjoy the whole month of July! I originally shared this post on Or So She Says. I am loving my new Patriotic Table Runner Tutorial. I have table runners for several other holidays, but not a good one for the 4th of July. It was time to fix that. Let’s get making a table runner!
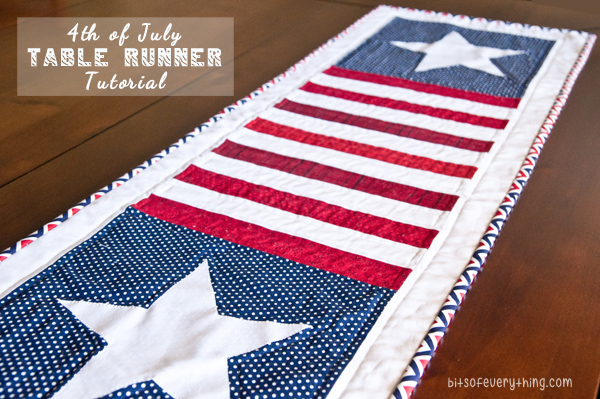
Finished size: 16 X 46 inches
Supplies needed:
- 1/3 yard navy blue fabric
- 1 fat quarter (or scraps) red fabric
- 1/2 yard white fabric
- 1/2 yard fabric for backing, plus a few scraps.
- 1/4 yard fabric for binding
- Batting size approx. 18 X 48 inches
- 1/4 yard wonder under (for appliquéing the stars)
1. Cut Fabric.
- Navy blue squares – cut 12 X 12 inches.
- Red and White Stripes – cut 2 X 12 inches.
- White Border – cut 3 strips 2 X 44 inches (width of fabric)
- Binding – cut 3 strips 2.5 X 44 inches (width of fabric)
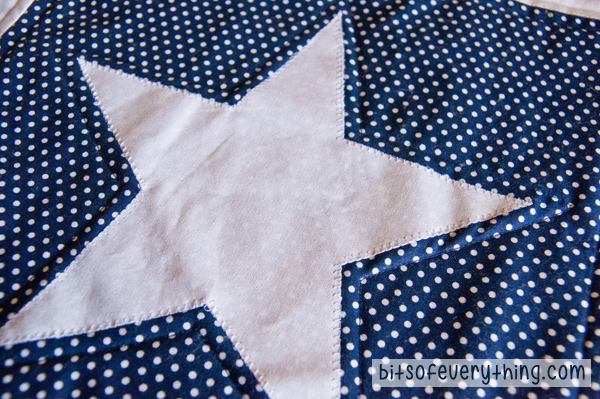
2. Cut and Applique Stars.
- Print this star (or draw your own). My star is about 8.5 inches across. Trace onto fusible web, and iron onto white fabric. Then, cut out along traced lines. Peel off the paper layer and iron onto the navy blue squares. If you are new to applique, here is a basic tutorial for you.
3. Sew.
- Sew the red and white strips together. Sew the blue squares onto both ends. Press seams open. Sew your white border strips onto the long sides of the table runner first, then the shorter sides. Press seams open.
- Sew some scraps onto the backing piece. The width of fabric is just a little bit too short. I added a 3 inch strip on each end, because I like things symmetrical. 🙂
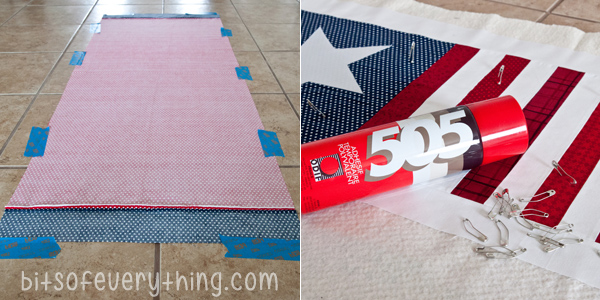
4. Quilt.
- There are a few things that can make putting all your layers together easier. First, tape your backing to the floor so it doesn’t move. Be sure to not stretch your fabric. Use adhesive spray and curved safety pins to keep the layers together.
- Machine quilting is my favorite. This is easily done on a standard sewing machine. For this table runner, I just used straight lines, nice and easy. I used white thread on the white, blue thread on the blue, and red thread on the red.
5. Bind.
- There are several ways to do binding. This is my favorite way. Sew your three strips of fabric together so that you have one super long piece of fabric. Press in half, wrong sides together. Sew strip onto the front of your table runner. Tack down the back side by hand or with your machine (I always do it by hand!). If you need more tips for binding, I love this tutorial.
6. Enjoy!
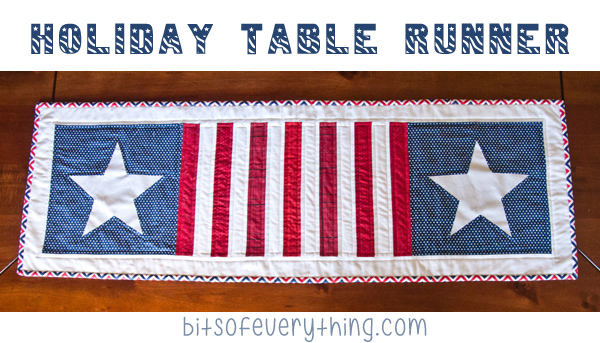
You are now ready to add a little holiday decor to your table this summer. I hope you enjoyed this project. A few other things you might like are my Christmas Tree Table Runner, My Favorite Quilting Supplies, and Making quilts with Friends. Come say hi!
Looks so cute Holly!! I’ll have to try it!
Still love this. Great job! Nichole @OrSo She Says
So Cute Holly!
Holly – It was so fun to meet you at BYBC. I had to take a peek at your blog, especially the sewing pages 😉 Always good to run into another sewing enthusiast! You have some super cute projects, and I’m off to explore some more!!
You done an excellent job. Your article has such an great content.
Directory Lister Pro 2.41 Crack
Hi Holly,
How I can print the instructions for the Patriotic Table Runner? I’m new quilting and need to have the instructions close by. Thanks, Carole
You made my work so easy as i was searching a way how to create this table. Thanks Dear
Thanks for sharing this! Just made one myself.